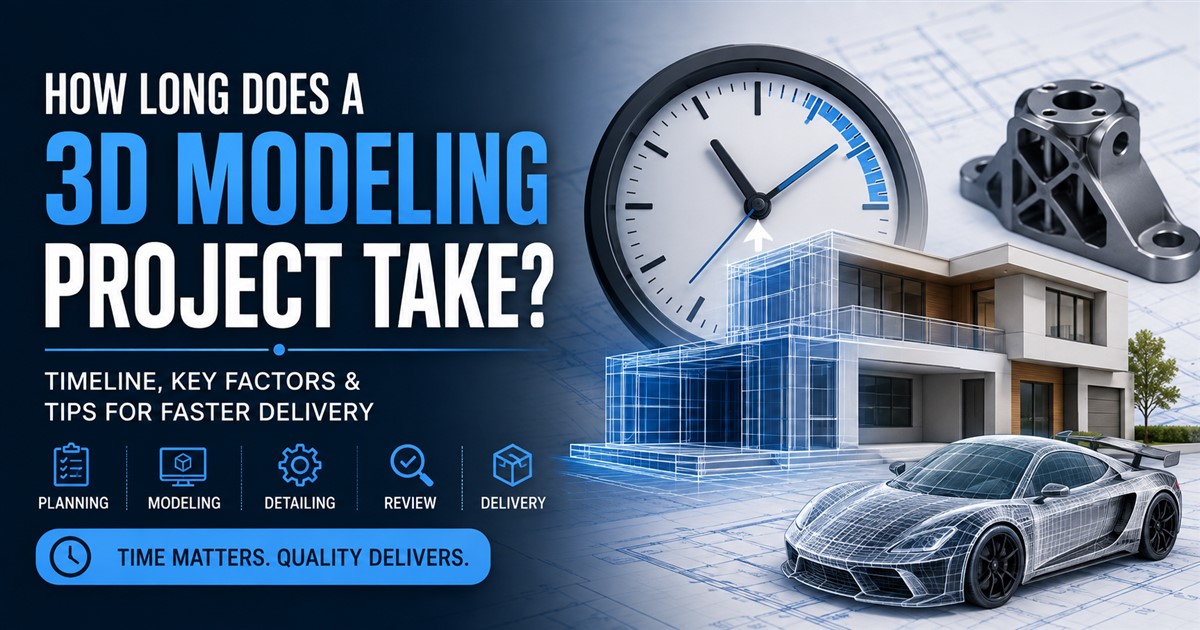

The 3D modeling process turns an idea, drawing, photograph, or technical plan into a detailed digital object. 3D models are now used in many industries, including manufacturing, architecture, gaming, product design, eCommerce, advertising, animation, and real estate.
Although the final model may look simple, creating it usually involves several steps. A professional 3D modeling workflow starts with understanding the project and ends with a finished model that is ready for its intended use.
The exact process can change depending on the type of model. A product made for manufacturing may need accurate measurements and engineering details, while a game asset needs optimized geometry and suitable textures. An architectural model may require rooms, furniture, materials, lighting, and other building details.
In this guide, we will explain the 3D modeling process from concept to final model, including planning, reference collection, modeling, texturing, testing, revisions, and final delivery.
What Is the 3D Modeling Process?
The 3D modeling process is a series of steps used to create a three-dimensional digital representation of an object, product, building, character, or environment.
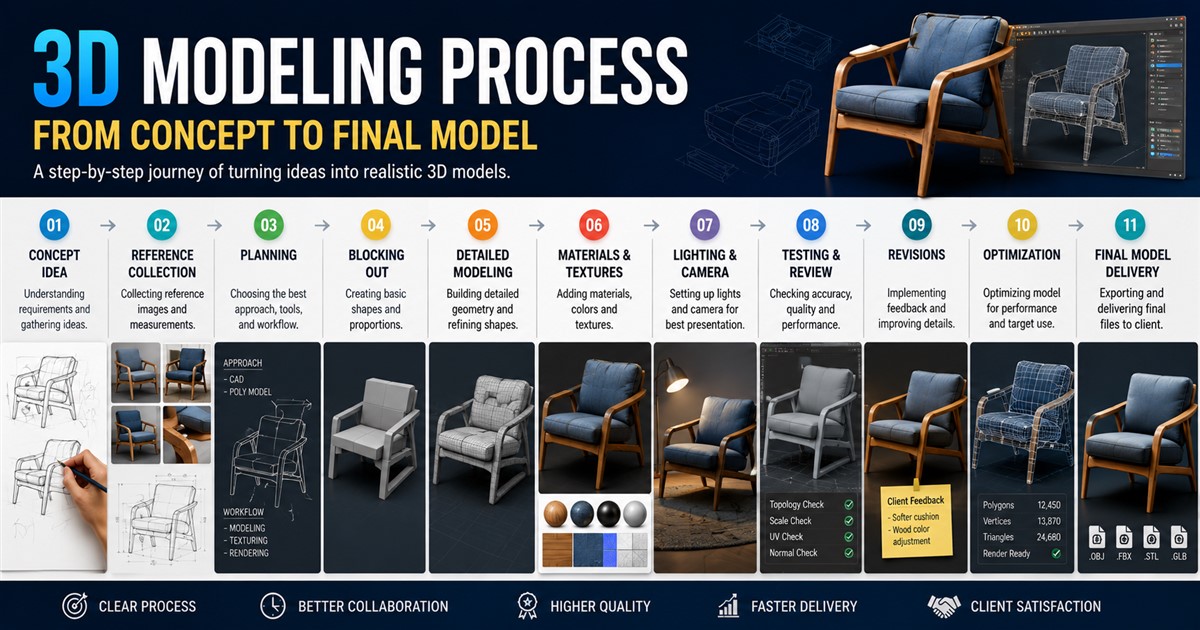
A typical workflow can include:
- Understanding the project requirements
- Collecting references
- Planning the model
- Creating basic shapes
- Building detailed geometry
- Adding materials and textures
- Checking the model
- Making revisions
- Optimizing the final asset
- Exporting and delivering the required files
The process is not always completely linear. Artists may move back and forth between stages when a client requests changes or when testing reveals a problem.
If you want a general introduction before looking at the workflow, this guide explains what 3D modeling is and where it is commonly used.
Step 1: Understand the Project Requirements
The first step is understanding exactly what needs to be created. Before opening any 3D software, the artist or designer needs to know the purpose of the model.
This is important because the final model will be built differently depending on its intended use.
For example, a manufacturer may need a highly accurate CAD model, while an advertising agency may need a visually detailed model for a product rendering. A game developer may need a lightweight model that performs well in a real-time engine.
Important project questions include:
- What object or environment needs to be modeled?
- What will the model be used for?
- What level of detail is required?
- Are exact dimensions available?
- Which software will be used?
- Which file format is required?
- Does the model need textures?
- Does it need animation or rigging?
- Will it be manufactured or only visualized?
- Are there polygon or file-size limits?
Clear requirements at the beginning can prevent expensive changes later in the project.
Step 2: Collect References and Source Material
After the requirements are clear, the next step is collecting reference material. References give the 3D artist the information needed to understand the object’s shape, proportions, materials, and small details.
References can include:
- Hand-drawn sketches
- Product photographs
- Technical drawings
- CAD drawings
- Blueprints
- Measurements
- Existing 3D files
- Orthographic views
- Material samples
- Construction documents
The quality of the reference material can have a major effect on the final result. If an artist only has one photograph of an object, some parts may need to be estimated. Multiple views and accurate measurements make the process easier and more reliable.
Step 3: Create a Modeling Plan
Once the references are ready, the artist creates a plan for building the model. This stage involves deciding which modeling technique and software are most suitable.
A simple product may be created with polygonal or CAD modeling. A mechanical component may require precise solid or parametric modeling. An organic character may benefit from sculpting and polygonal techniques.
| Project Type | Common Modeling Approach | Main Priority |
|---|---|---|
| Manufacturing Part | CAD / Solid Modeling | Accuracy |
| Consumer Product | CAD / Polygonal Modeling | Shape and detail |
| Building | Architectural / BIM Modeling | Structure and presentation |
| Game Asset | Polygonal Modeling | Performance and appearance |
| Character | Sculpting / Polygonal Modeling | Form and detail |
| Marketing Asset | Polygonal / CAD Modeling | Visual quality |
Step 4: Build the Basic Shape
The actual modeling work usually starts with simple shapes. This stage is sometimes called blockout or base modeling.
The artist creates basic forms such as cubes, cylinders, spheres, planes, and other simple geometry. These shapes are then adjusted to match the reference material.
At this point, the goal is not to add every small detail. The focus is on getting the overall size, proportions, and shape correct.
For example, when modeling a chair, the artist may first create simple blocks for the seat, backrest, legs, and armrests. Once the proportions look correct, more detailed geometry can be added.
This approach makes it easier to identify major problems early instead of discovering them after hours of detailed work.
Step 5: Create Detailed Geometry
After the basic shape has been approved, the artist starts creating the detailed geometry. This is where the model begins to closely match the reference.
Depending on the project, this can include curves, edges, holes, bevels, panels, seams, buttons, mechanical components, surface details, or other features.
For manufacturing projects, the geometry may need to follow exact dimensions. For visual models, the focus may be on creating realistic shapes and clean surfaces.
Topology also becomes important at this stage. Good topology helps the model remain clean, editable, and suitable for its intended purpose.
Step 6: Check Dimensions and Accuracy
Accuracy is especially important for products, mechanical components, architecture, and manufacturing.
The artist checks the model against the available measurements and technical information. Important dimensions may include length, width, height, thickness, hole diameter, angles, and distances between components.
For projects that require technical drawings or documentation, 3D modeling and drafting may be used together. This is why understanding the difference between 3D CAD modeling and CAD drafting can be useful when planning an engineering project.
Step 7: Add Materials and Textures
Once the geometry is complete, materials and textures can be added. These elements help determine how the model looks when rendered or displayed in a 3D application.
Materials can represent surfaces such as:
- Metal
- Plastic
- Glass
- Wood
- Fabric
- Leather
- Concrete
- Stone
- Painted surfaces
Textures can add visual information such as color, patterns, scratches, roughness, and other surface characteristics.
Not every 3D model needs textures. A technical CAD model, for example, may only require accurate geometry. A product visualization model, however, may need realistic materials to create a convincing final image.
Step 8: Add Lighting and Camera Setup for Visualization
If the model will be used for rendering, the next stage may involve setting up lights and cameras.
Lighting can change how the model appears. Good lighting can show curves, edges, materials, and small details clearly. The camera determines the viewpoint and composition.
For product visualization, artists may create several camera angles to show the product from different sides. For architecture, cameras can be placed inside and outside the building to create interior and exterior views.
The model itself may remain the same while different lighting and camera setups create completely different visual results.
Step 9: Test the Model
Testing is an important part of the 3D modeling workflow. The artist checks whether the model works correctly for its intended purpose.
Different projects require different tests.
| Project | Important Checks |
|---|---|
| Manufacturing | Dimensions, geometry, tolerances, components |
| Architecture | Scale, structure, rooms, materials, details |
| Games | Polygon count, topology, UVs, textures, performance |
| Product Visualization | Shape, materials, textures, lighting, camera |
| Animation | Topology, deformation, rigging, movement |
Step 10: Make Revisions
It is normal for a 3D modeling project to go through revisions. A client may notice that a dimension needs to change, a surface needs more detail, or a part does not match the reference.
Revisions are easier when the original model has been created using a clean and organized workflow.
Instead of treating revisions as a problem, they should be considered a normal part of the design process. Reviewing the model before final delivery helps ensure that it meets the original requirements.
Step 11: Optimize the Final Model
Optimization means adjusting the model so it provides the required quality without unnecessary complexity.
A model created for a high-resolution marketing image can contain a large amount of detail. The same model may be too heavy for a website, mobile application, virtual reality project, or game.
Optimization may involve reducing polygon counts, cleaning topology, resizing textures, removing unnecessary geometry, and choosing suitable file settings.
The goal is to maintain the required visual or technical quality while making the model practical for its intended environment.
Step 12: Export the Final Model
After the model has been approved and tested, it can be exported into the required file format.
Different applications support different formats. Common 3D formats include OBJ, FBX, STL, STEP, IGES, GLB, and others.
The correct format depends on what the client or application needs. For example, a manufacturing workflow may require a CAD-compatible format, while a game engine may require a real-time 3D format.
It is important to confirm the required format before beginning the project. This can prevent problems during the final delivery stage.
Step 13: Final Quality Check and Delivery
The final stage is a complete quality check. The artist reviews the model one more time and confirms that the files meet the agreed requirements.
A final checklist may include:
- Correct dimensions
- Correct scale
- Clean geometry
- Correct materials
- Complete textures
- Correct file format
- Proper file naming
- Optimized file size
- No missing assets
- Required renders or supporting files included
Once everything is checked, the final files can be delivered to the client or uploaded into the target application.
How Long Does the 3D Modeling Process Take?
The time required for a 3D modeling project depends on its complexity. A simple object may take only a short amount of time, while a detailed building, machine, character, or large environment can require much longer.
| Project Complexity | Typical Factors Affecting Time |
|---|---|
| Simple | Basic shape, few details, limited revisions |
| Moderate | Multiple parts, detailed surfaces, textures |
| Complex | High detail, complex geometry, multiple components |
| Large Project | Buildings, environments, assemblies, many assets |
The quality of the reference files and the number of revisions can also affect the timeline. If you need a more detailed understanding of project schedules, you can review this guide to the 3D modeling timeline.
Why a Structured 3D Modeling Workflow Matters
A structured workflow helps keep the project organized from beginning to end. It also makes it easier to identify problems early and communicate progress with clients.
Some of the main benefits include:
- Better accuracy: Requirements and measurements are checked throughout the process.
- Fewer mistakes: Problems can be identified before final delivery.
- Easier revisions: Organized models are easier to update.
- Better quality: Each stage receives attention before moving to the next.
- Efficient production: Artists can follow a repeatable process.
- Reliable delivery: Files can be prepared according to the client’s technical requirements.
How the Process Changes for Different Industries
Although the basic workflow is similar, the priorities change from one industry to another.
Manufacturing
Manufacturing models focus heavily on accuracy, dimensions, components, and production requirements. CAD and solid modeling are often important parts of this workflow.
Architecture
Architectural modeling focuses on creating accurate buildings and spaces. Walls, floors, doors, windows, furniture, materials, and surrounding elements may all be included.
Gaming
Game modeling focuses on visual quality and performance. Models often need optimized geometry, proper UV mapping, textures, and suitable file formats for the target game engine.
Product Visualization
Product visualization focuses on creating attractive and realistic digital products. Detailed geometry, materials, lighting, and camera composition are especially important.
Can AI Be Used in the 3D Modeling Process?
Yes. AI tools are becoming part of modern 3D workflows. Depending on the software, AI can assist with tasks such as generating basic 3D shapes, creating textures, converting images into 3D assets, and speeding up repetitive tasks.
However, AI-generated output may still require human review and editing. A professional artist can correct geometry, improve topology, adjust proportions, optimize the model, and prepare the final asset for a specific use.
This makes AI useful as a supporting tool rather than a complete replacement for every stage of professional 3D production.
Frequently Asked Questions
What is the first step in the 3D modeling process?
The first step is understanding the project requirements. This includes identifying what needs to be modeled, how it will be used, the required level of detail, dimensions, software, file formats, and other technical requirements.
How do you start a 3D model?
Most projects start by collecting references and creating a basic blockout. Simple shapes are used to establish the overall proportions before detailed geometry is created.
How long does it take to create a 3D model?
The timeline depends on the object’s complexity, level of detail, quality of references, required file formats, and number of revisions. A simple object can be completed much faster than a complex building, character, or mechanical assembly.
What information does a 3D artist need from a client?
A 3D artist may need sketches, photographs, measurements, technical drawings, reference images, existing CAD files, material information, and details about how the final model will be used.
Does every 3D model need textures?
No. Textures are not required for every project. Technical models may focus mainly on accurate geometry, while product visualization, animation, and game assets may require detailed materials and textures.
What happens after a 3D model is finished?
The model is checked for accuracy, quality, performance, and compatibility. After revisions and final approval, it is exported into the required file format and delivered for its intended use.
Final Thoughts
The 3D modeling process is much more than simply creating a digital object. It is a structured workflow that starts with understanding the concept and ends with a tested, optimized, and properly formatted final model.
Each stage has an important purpose. Good references help establish accuracy, careful modeling creates the correct shape, materials add visual detail, testing identifies problems, and optimization makes the final asset suitable for its target application.
Whether you need a product model for manufacturing, an architectural model for visualization, or an optimized asset for a game, following a clear workflow can improve both quality and efficiency.
If you are planning a 3D project and need professional modeling support, you can contact a 3D modeling service team with your project details, reference files, and requirements to discuss the best approach.